Bargain Reviews
 0 likesEgypt Tours from Australiaibogaine for sale australiaradiated tortoise for saleafrican dwarf mud turtle for saledracula parrot pet for saleelectric unicycle for salekingsong 18xlonline dispensary that ships to all statesbuy ma ... (10/05/2024 11:16:49)
- 0 likesEgypt Tours from Australiabuy jeuveau onlineazzalure botox buy onlinebuy cocaine onlinebuy clone cards onlineclone cards for salebuy weed onlinebuy meth onlinecolorado dispensary shipping worldwidecolorado dispensaries that sh ... (10/05/2024 11:16:15)
- 0 likesEgypt Tours from Australiaa href="https://passiontortoise.com/product/fly-river-turtle/">fly river turtle for saleegyptian tortoise for saledracula parrots for salehigh white leopard tortoise for salebuy ibogaine online usaalb ... (10/05/2024 11:15:42)
- 0 likesEgypt Tours from Australiacheap barber chairs for salediablo k2 spray on paperbuy diablo sprayibogaine for salebuy african transkei cubensis mushrooms onlinedmt carts for saledmt cartridge for salepig nosed turtle for salespec ... (10/05/2024 11:15:18)
AutoCAD 2023 Tutorial for Beginners: 3 Steps to Success
AutoCAD 2023 Tutorial for Beginners: 3 Steps to Success
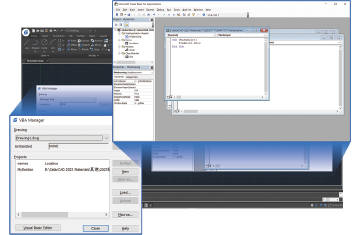
AutoCAD is arguably the most known CAD software worldwide. First released by Autodesk in 1982, it’s now used for a wide range of applications, including architectural plans, layouts, and product manufacturing drawings. This versatility has made AutoCAD a standard for some industries.To get more news about cad tutorial, you can visit shine news official website.
In this tutorial, you’re going to learn the basics of how to use AutoCAD and create your first designs in just six steps. We’ll first learn how to get around and then jump right into 2D sketching. After that, we’ll move on to discover its 3D modeling and technical drawing tools. Last but not least, let’s learn how to work with mesh files, including exporting STL models for 3D printing.
AutoCAD is developed and maintained by Autodesk, the software giant that also offers other CAD and 3D modeling programs like Inventor, Revit, Maya, 3ds Max, Tinkercad, and Fusion 360.
AutoCAD is professional design software, so the price is steep at $1,775 per year. Luckily, students and educators get unlimited free access for up to a year. If that’s not your case, there are some free alternatives to AutoCAD, as well. Additionally, Autodesk offers a 30-day free trial for anyone, which is more than enough time to follow along with this tutorial and learn if it’s the tool for you!
To download AutoCAD, you’ll first need to set up an Autodesk account. There are versions for both Windows and Mac, which vary slightly in terms of UI, but the installation processes are very straightforward.
Step 1: Know the UI
Ok, now we’re ready to play with the software. In the first step of this tutorial, we’ll get acquainted with the user interface and learn how to interact with and set up the workspace.
To start a new project in AutoCAD, click “New” on the left side panel. This is AutoCAD’s main working screen, where all 2D and 3D designing takes place. Basically, it’s composed of the following:
1.2: Setting Up the Workspace
Looking at the Quick Access Toolbar, click on the downward extend arrow to customize this toolbar. A dropdown menu will pop up; click on “Workspace” to enable this feature.
Now the Quick Access Toolbar will display a new button. By default, it’s “Drafting & Annotation”, but let’s change it to “3D Modeling” by clicking on it and selecting this choice from the dropdown menu. This will allow us to use all 2D and 3D tools required for our tutorial.
Lastly, to change units, click on the AutoCAD logo in the top-left corner. This will open the AutoCAD menu. Go to “Drawing Utilities > Units”. In this tutorial, we’ll use the metric system, so change the “Insertion Scale” to millimeters.
Step 2: 2D Sketching
Grip snapping is a great feature for sketching with AutoCAD. To enable Grid Snap, simply press F9 on your keyboard or click on enable “Snap to Drawing Grid” at the bottom right-hand corner.
Click on the extend arrow next to the “Snap to Drawing Grid button” and select “Snap Settings…”. This window allows you to adjust the grid as well as the accuracy of the grid snap. Go to the “Object Snap” tab and enable it.
Now, by pressing F3, we can activate snapping to corners, lines, points, and midpoints, among many options. To select object snapping constraints, click on the extend arrow as shown. Click on “Tangent” to make it active, as shown above.
If you have problems with entering coordinates or sketching, try toggling “Snapping” on or off, and try not to use Grid and Object Snap simultaneously. This tool is useful to draw sketches fast and to prevent holes in your sketch.
Step 3: 3D Modeling
Let’s start with some direct modeling tools. This is when we use predefined shapes like spheres and cubes to create objects via Boolean operations (union, subtraction, and intersect).
First, switch to the isometric view through the View Cube by clicking on the little house icon.
Now let’s start by creating a perfectly round body. Type in “sphere” and center it at (0,0). Once that’s set, move your mouse around it to gain form. Alternatively, enter a value for the radius which in this case is 10 mm.
This how you create basic three-dimensional shapes. Easy enough, right? Still, the object doesn’t really look like a solid yet. Let’s change that.  Until 19/06/2023 23:59:59
AutoCAD is arguably the most known CAD software worldwide. First released by Autodesk in 1982, it’s now used for a wide range of applications, including architectural plans, layouts, and product manufacturing drawings. This versatility has made AutoCAD a standard for some industries.To get more news about cad tutorial, you can visit shine news official website.
In this tutorial, you’re going to learn the basics of how to use AutoCAD and create your first designs in just six steps. We’ll first learn how to get around and then jump right into 2D sketching. After that, we’ll move on to discover its 3D modeling and technical drawing tools. Last but not least, let’s learn how to work with mesh files, including exporting STL models for 3D printing.
AutoCAD is developed and maintained by Autodesk, the software giant that also offers other CAD and 3D modeling programs like Inventor, Revit, Maya, 3ds Max, Tinkercad, and Fusion 360.
AutoCAD is professional design software, so the price is steep at $1,775 per year. Luckily, students and educators get unlimited free access for up to a year. If that’s not your case, there are some free alternatives to AutoCAD, as well. Additionally, Autodesk offers a 30-day free trial for anyone, which is more than enough time to follow along with this tutorial and learn if it’s the tool for you!
To download AutoCAD, you’ll first need to set up an Autodesk account. There are versions for both Windows and Mac, which vary slightly in terms of UI, but the installation processes are very straightforward.
Step 1: Know the UI
Ok, now we’re ready to play with the software. In the first step of this tutorial, we’ll get acquainted with the user interface and learn how to interact with and set up the workspace.
To start a new project in AutoCAD, click “New” on the left side panel. This is AutoCAD’s main working screen, where all 2D and 3D designing takes place. Basically, it’s composed of the following:
1.2: Setting Up the Workspace
Looking at the Quick Access Toolbar, click on the downward extend arrow to customize this toolbar. A dropdown menu will pop up; click on “Workspace” to enable this feature.
Now the Quick Access Toolbar will display a new button. By default, it’s “Drafting & Annotation”, but let’s change it to “3D Modeling” by clicking on it and selecting this choice from the dropdown menu. This will allow us to use all 2D and 3D tools required for our tutorial.
Lastly, to change units, click on the AutoCAD logo in the top-left corner. This will open the AutoCAD menu. Go to “Drawing Utilities > Units”. In this tutorial, we’ll use the metric system, so change the “Insertion Scale” to millimeters.
Step 2: 2D Sketching
Grip snapping is a great feature for sketching with AutoCAD. To enable Grid Snap, simply press F9 on your keyboard or click on enable “Snap to Drawing Grid” at the bottom right-hand corner.
Click on the extend arrow next to the “Snap to Drawing Grid button” and select “Snap Settings…”. This window allows you to adjust the grid as well as the accuracy of the grid snap. Go to the “Object Snap” tab and enable it.
Now, by pressing F3, we can activate snapping to corners, lines, points, and midpoints, among many options. To select object snapping constraints, click on the extend arrow as shown. Click on “Tangent” to make it active, as shown above.
If you have problems with entering coordinates or sketching, try toggling “Snapping” on or off, and try not to use Grid and Object Snap simultaneously. This tool is useful to draw sketches fast and to prevent holes in your sketch.
Step 3: 3D Modeling
Let’s start with some direct modeling tools. This is when we use predefined shapes like spheres and cubes to create objects via Boolean operations (union, subtraction, and intersect).
First, switch to the isometric view through the View Cube by clicking on the little house icon.
Now let’s start by creating a perfectly round body. Type in “sphere” and center it at (0,0). Once that’s set, move your mouse around it to gain form. Alternatively, enter a value for the radius which in this case is 10 mm.
This how you create basic three-dimensional shapes. Easy enough, right? Still, the object doesn’t really look like a solid yet. Let’s change that.
qocsuing 325 days ago


- Company
- About us
- Contact us
- FAQ's
- Login
- Sign up
- Forgot login
- Terms
- Terms of use
- Privacy policy
- My account
- My business ratings
- My articles in blog
- My videos
- My account setting
- Blog setting
- Personal setting
- Languages setting
- Email setting
- Newsletter setting
- My avatar
- Retabe Dollar
- Rating with type
- Shopping
- Entertainment
- Eating
- Professional
- Rating with location
- Whole Australia
- Sydney
- Melbourne
- Brisbane
- Canberra
 Deals Facebook
 Google plus
 Deals Twitter
Share this bargain with your friends: